Shipping Configurations
Watch the video tours to explore the guide in action and see how it works.
Video Tour 1
Video Tour 2
This guide will help you activate the shipping, place an order, and assemble it from the partner's page. Each store should enter the box and item size for the system to activate the shipping.
*Please note that for shipping to work, 1 item should have an additional category in the department.
Let’s start!
-
Access Shipping Settings by going to the "Products" section in your dashboard and choosing the item you want to make changes to.

- Turn on the "Shipping" option and enter the dimensions and weight of your product. Include the packaging length, width, height, and weight. Repeat this step for each item.

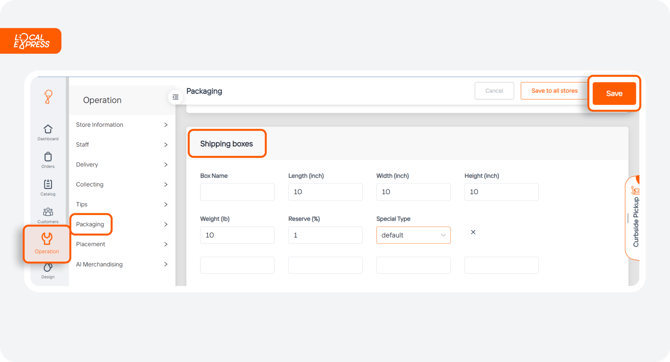
- Configure Packaging by selecting "Operation" from the dashboard, and then clicking the "Packaging" section.

- In the "Shipping Boxes" area, click on "Add Box". Enter details for the box including its name, length, width, height, weight, and reserve percentage.

- Use the "Special Type" button to specify the type of product (e.g., frozen, dry, cold, ice, or hot).

-
Save your settings.
-
In the "Delivery" section, enable shipping. This allows customers to place orders for items with predefined dimensions. Save your changes to finalize the setup.

How to Place the Shipping Order
-
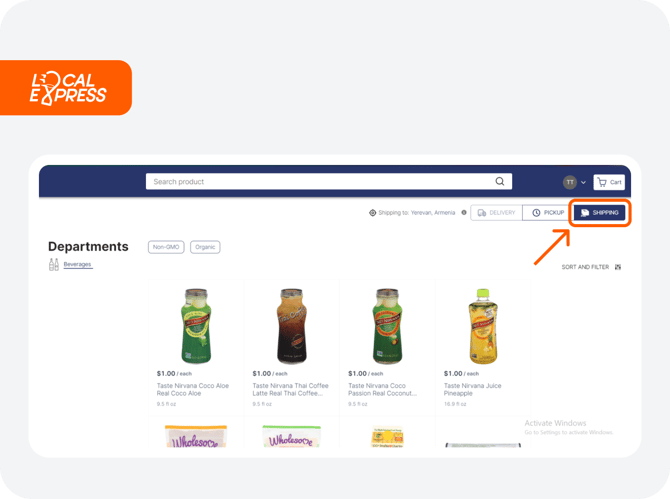
Choose shipping from the merchant's site, select the item you want to ship, and add it to the cart.

-
Fill in the required fields step by step:
a. The address
b. Out-of-stock replacement (as needed)
c. Select the delivery company
d. The payment
e. Billing address, if it is different from the shipping address
f. Place the order

How to Collect the Shipping Order from the Partner’s Page after the Order Has Been Placed
-
Go to Orders, search for the order, accept it, and start collecting.

-
When the order is collected, finish collecting.

-
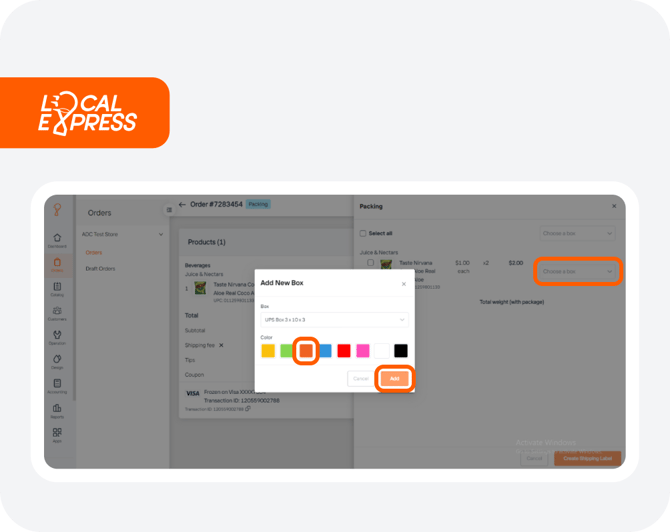
Pack the order and continue.

-
Choose a box (you need to choose the color of the box because you can use one size of several boxes and the color will help you to distinguish them) and add it.

-
Fill in the total weight (with the package), recalculate shipping, choose the delivery company, and create the shipping label.

-
Print out the label.

The store should print out the label, pre-crystalize it on a box, and take it to the post office. Tracking information will appear in the order info.
By following these instructions, each store can ensure accurate item and box size entries, enabling smooth shipping operations. Let’s get started and streamline your shipping process effectively!
