
Watch the video tour to explore the guide in action and see how it works.
KDS: Quick collecting mode on tablets
• 1 KDS: Quick collecting overview
• 2 KDS Setup
• 3 KDS Usage
KDS: Quick collecting overview
The Local Express Partner App has an option to use tablets devices for the quick collecting mode when the app is running on the tablets. The quick collecting mode provides the order process flow used in many fast food restaurants, where the staff need to quickly prepare and collect the orders, and change their status with a single tap on the tablet.
KDS Setup
In the Local Express Partner App, the partner can configure the app layout (in the More tab in the bottom of the screen) so it will fit the tablet screen in the most convenient way (Figure 1).
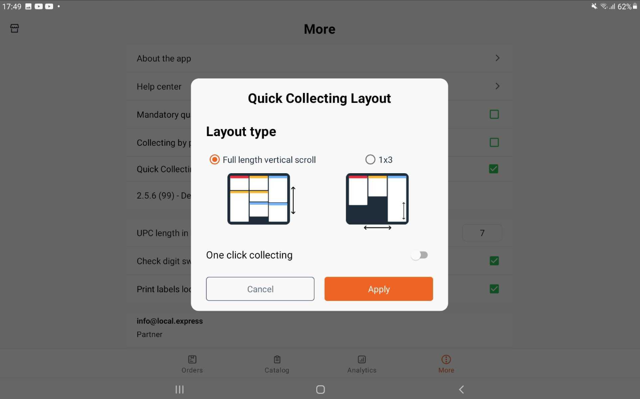
Figure 1. Orders layout on the tablet screen.
The user can also enable or disable the One click collecting flow. The one click collecting flow handles the orders so when they are shown on the tablet screen the will have only the Finish collecting button, so the staff can start collecting when the order appears on the screen and just confirm that it is collected with a single tap on the screen.
Note: The advanced collecting flow must be disabled to make sure the user can enable the one click collecting.
When the One click collecting is disabled, the user will have to tap the Start collecting button to confirm that they are working on the order collecting, and tap the Finish collecting after that, to confirm the order has been collected.
Note: the new orders appear in tabs in real time, so the app keeps the order lists constantly updated.
Depending on the chosen layout, the In progress orders will be shown on the tablet in the following way (Figure 2).
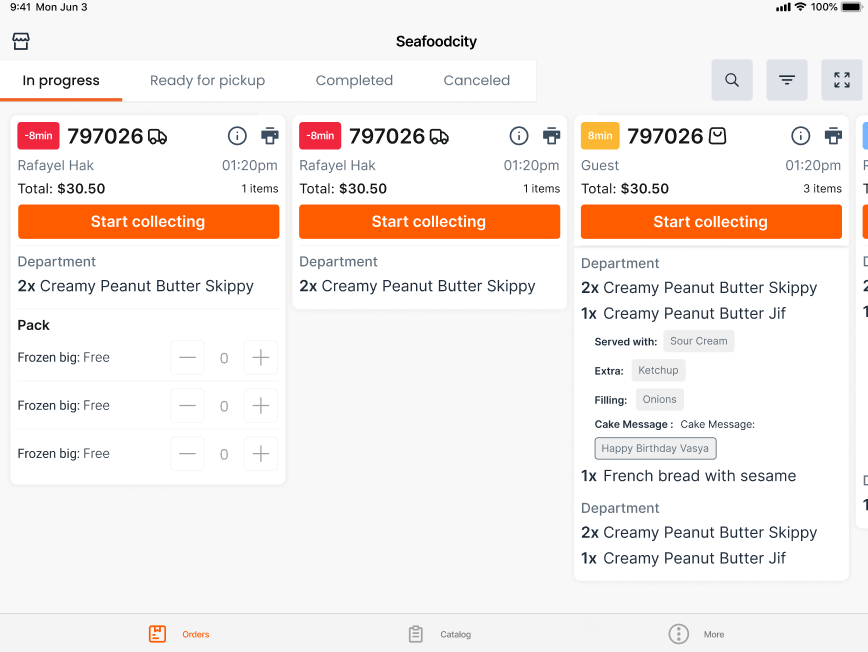
Figure 2. In progress orders on the tablet screen.
KDS Usage
You can see the In progress, Ready for pickup, Completed and Cancelled tabs which can show you the orders in the respective status. It is possible to slide the orders list left or right, showing the entire list of open orders. Each order is represented in an individual frame with the Order ID, approximate delivery time (which affects the color of order’s header: urgent orders are marked with red; second priority orders are yellow; least urgent orders are blue), order total amount, products in the orders, and packs.
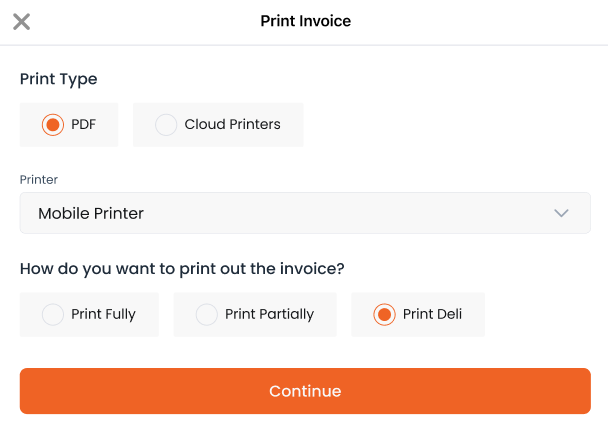
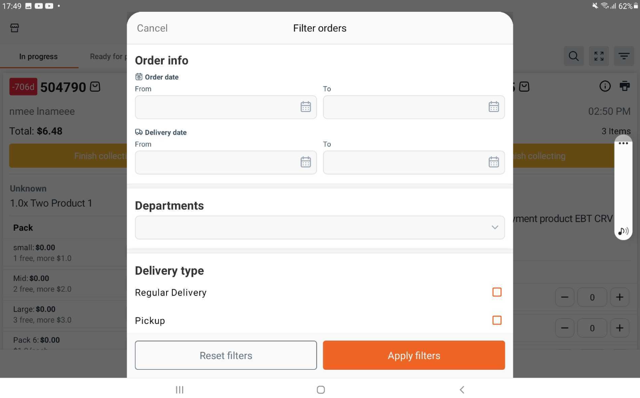
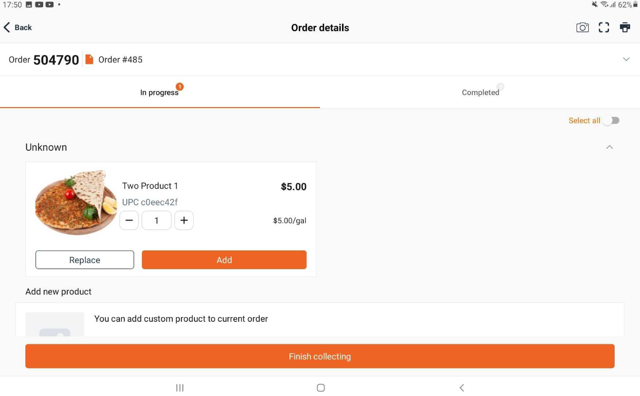
You can filter the orders from the order list by delivery or order creation date,department, and delviery type by tapping the filter button, or print the order receipt by tapping the printer button. You can also see the details of a specific order and add, replace, or change quantity of the products or item modifications in the order.
 |
 |
 |
The search button in the top right corner allows to search for a specifc order by Order ID, delivery address, customer name, or other order details.
To start collecting an order, the store staff should tap the Start collecting button.
Below is how the orders with started collecting look like (Figure 3).
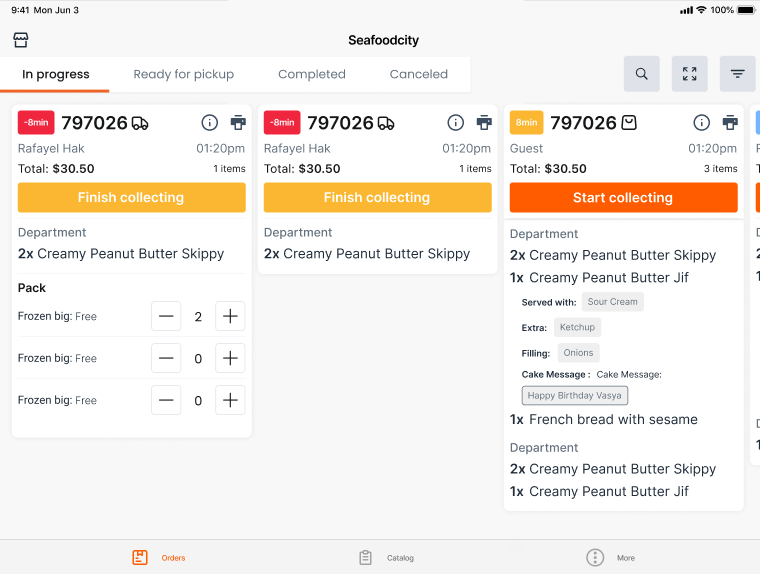
Figure 3. Orders with started collection.
After starting the order collection, store staff starts to cook or collect the items from the order. After all the products (items) are prepared, the staff member packs them into bags (if necessary) and adds packs (bags) to the order. If necessary, the staff member also puts the collected order to its pickup location. After the order is ready, click the Finish collecting button.
After that, the order will change its status from Collecting to Ready for Pickup.
You can also see the status of all the Ready for Pickup orders in the Ready for pickup tab (Figure 4).
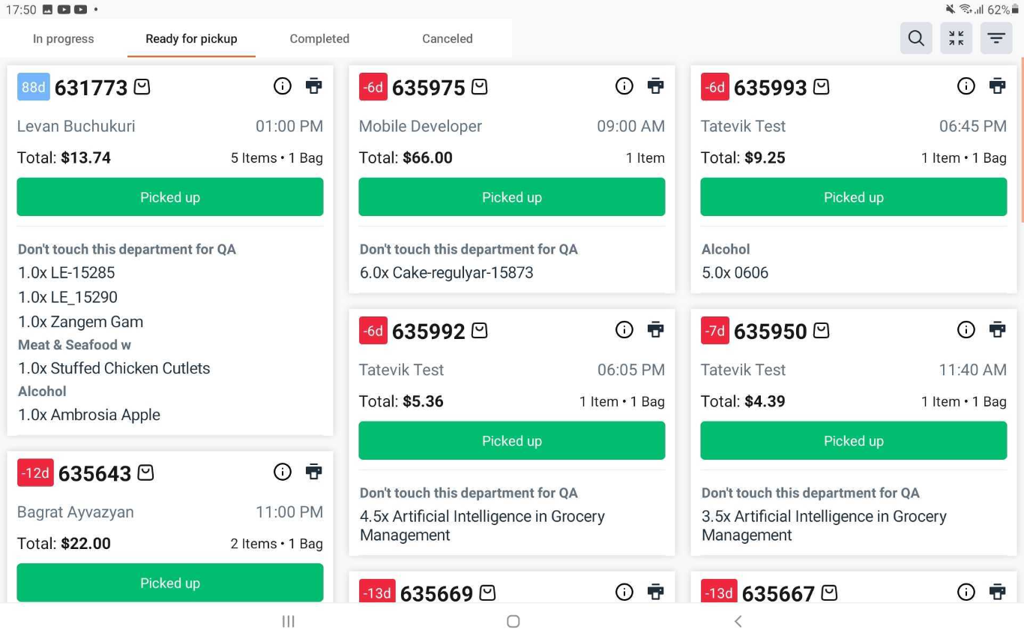
Figure 4. Ready for pickup tab.
The Ready for pickup orders will change their status to Picked up when they will be picked up by the delivery driver.
The Completed tab includes the completed orders that were received by the customers (Figure 5).
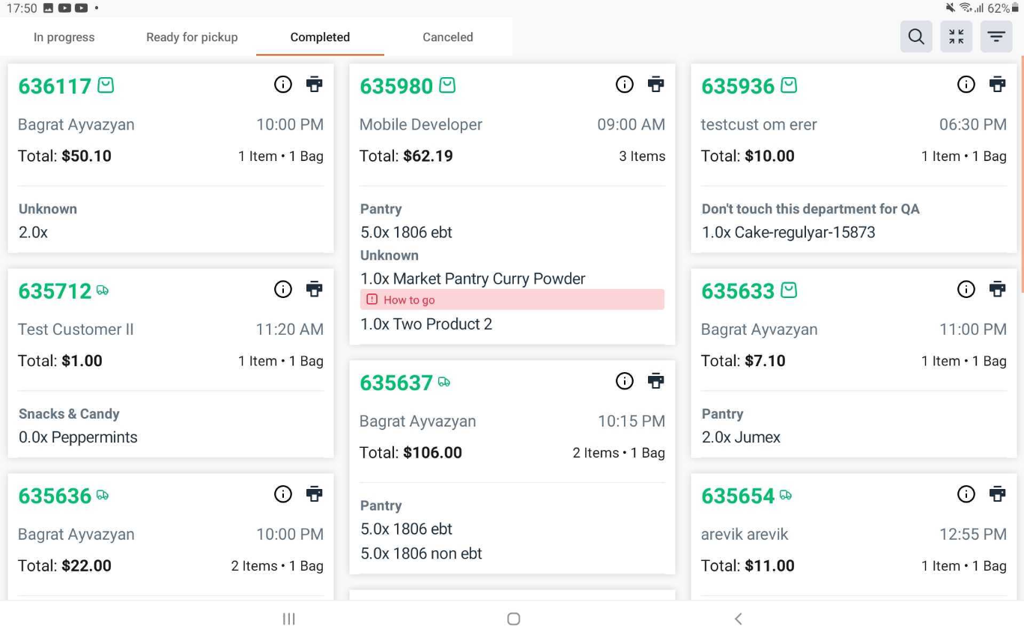
Figure 5. Completed tab.