How to Create a Sale (Discount)
Watch the video tour to explore the guide in action and see how it works.
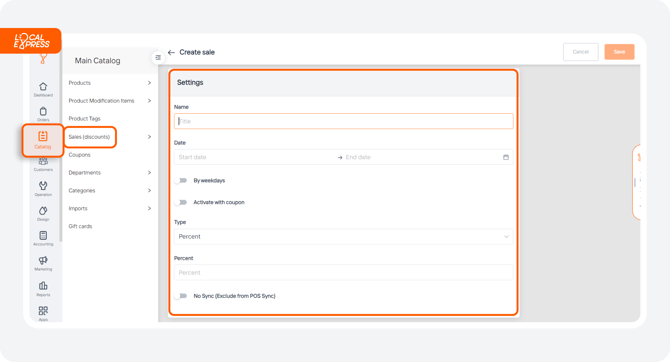
1. Access the partner dashboard and click on “Catalog”. Select “Sales (Discounts)” and then click on “Add Discount”.

- Name: Enter a name for the discount.
- Duration: Set the start and end dates.
- Days Active: Optionally, you can activate the discount on specific weekdays by selecting “by Weekdays”.
- Coupon Activation: Alternatively, enable the discount with a coupon by choosing “activate with coupon”.
- Type of Discount: Choose from options like percent off, buy one get one free, quantity discounts, fixed amount off, or mixed one free.
- Percent: Specify the discount amount or percentage.

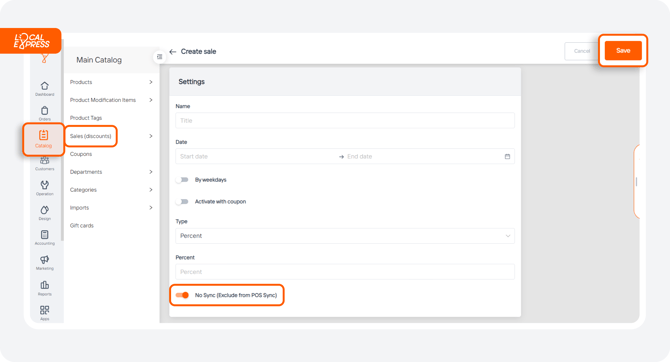
3. If you are using the POS system for pulling discounts, enable “No Sync”. This prevents the discount from being removed during synchronization. Click “Save” to store your settings.

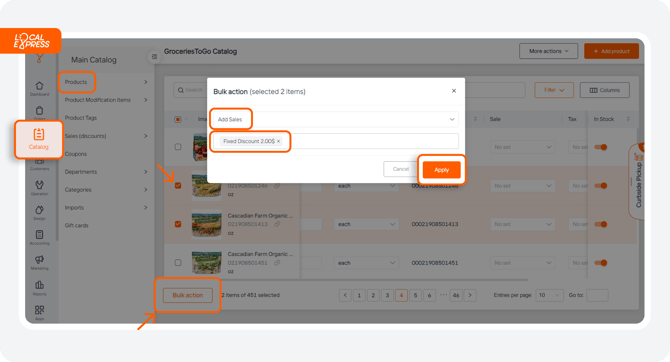
4. To link your new discount to selected products, go to the “Products” list and find the “Sale” section.

5. To apply the discount to multiple products navigate to “Bulk Action”, and choose “Add Sales”. Select the desired discount and apply it to the selected products by clicking on “Apply”.

